Feeds:
Posts
Comments

Archive for the ‘Summer Recipes’ Category

ratatouille grilled 2

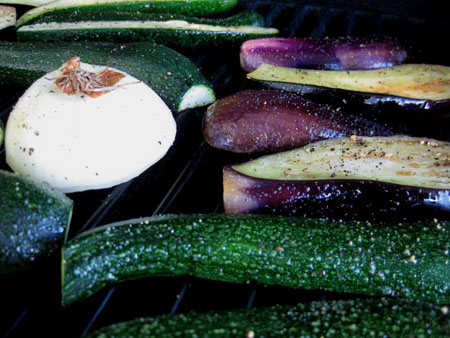
These are the vegetables on the grill.  You can broil the eggplant separately in the oven at 450 degrees if you are doing a huge batch and need more room on the grill for the summer squash, peppers, and onions.
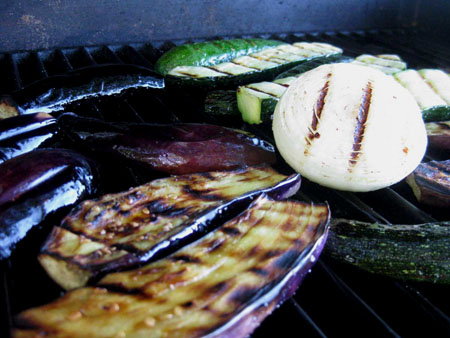
ratatouille roasted 2

The vegetables are done when they are cooked all the way through but aren’t mushy.
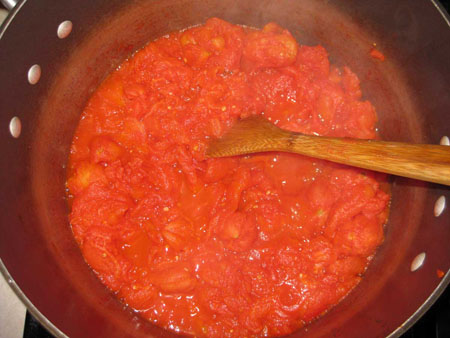
ratatouille tomatoes 2

Cook the tomatoes while the vegetables are all grilling and/or broiling.
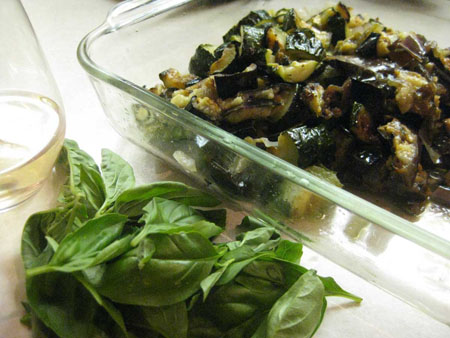
ratatouille basil 2

You can use other seasonings for ratatouille such as thyme, bay leaves, or herbes de Provence, but Lisa and I both prefer to simply use a truck load of fresh basil added right as you remove the ratatouille from the heat.
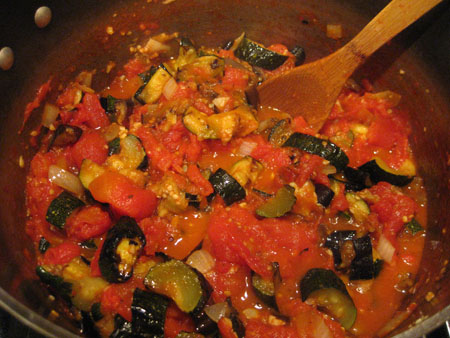
ratatouille 2

There are as many recipes for ratatouille as there are passionate cooks.  A traditional ratatouille is made by cooking the various ingredients separately first and then layer them in a casserole and then baked.  The main (important components) of ratatouille are: eggplant, tomatoes, summer squash, sweet peppers, fresh basil, and garlic.   There are hundreds of variations of this dish possible- you can use mushrooms, omit the peppers (I don’t digest sweet peppers well and never cook with them), make it chunkier or saucier.  What you must never leave out (if you want it to still be a ratatouille) is the eggplant, summer squash, tomatoes, garlic, and onions.

It should always be made in summer or early fall when all of these ingredients can be had fresh from the garden or from the farmer’s market.

The following version is from Lisa E and involves roasting and grilling most of the different ingredients and then adding them to the pot of cooking tomatoes.   She doesn’t give specific amounts for the ingredients because she never measures them.   My suggestion is to use roughly equal quantities of tomatoes and eggplant, slightly fewer summer squash in proportion, and even fewer sweet peppers, and for one big pot of ratatouille I would use two to three onions.  You can’t use too much fresh basil and the garlic should be to your personal taste.  My preference for a giant pot would be about 10 cloves minced.

Lisa’s Ratatouille

Ingredients:

tomatoes- peeled, cored, seeds squeezed out then coarsely chopped
eggplant, zucchini, red peppers- cut lengthwise into slabs, brush with olive oil, salt  & pepper
onions- quartered, brush with olive oil, salt & pepper
garlic- loads of it finely chopped
basil: chiffonade

In a large heavy bottomed pot heat olive oil (about a quarter cup), add tomatoes and cook at medium high; continue to cook while preparing other ingredients and until tomatoes get nice and broken down and saucy.

I usually roast the eggplant in the oven at 450 while the rest of the veg is on the grill.  Usually timing works out perfect: when veg is all cooked allow to cool enough to handle then coarsely chop it all and add it to the tomatoes along with the garlic.  Simmer until the flavors develop and it gets to the consistency you like, adjust salt & pepper to taste.  Stir in the basil when you turn off the heat.

When it has cooled I usually keep enough out for dinner and the rest goes (in either 2 cup or 4 cup increments) in quart size freezer bags (squeezing out all the air) or in food saver bags to freeze and then vacuum seal when it is frozen.  It isn’t high enough acid to can safely.

When I said it is a big batch technique I mean a full stockpot or if I am really ambitious I have my two biggest pots going at the same time.  That way I do it once during the season and have it stowed away in the deep freeze for meals throughout the year.

Serving Notes: I like it by itself with Parmesan, feta or goat cheese, with polenta, grilled or soft, any kind of pasta.  I have used it to make lasagna too.
Read Full Post »

roasted toms 2

This method of slow roasting tomatoes comes to me from my good friend Lisa E.. The point isn’t to completely dry the tomatoes, just to concentrate the flavors.  When they’re done they’ll have a thick, sweet, rich tomato flavor and the texture will be moist but not juicy.  Because you aren’t drying them, they can’t be stored in oil or in jars on the pantry shelf as you might do with dried tomatoes.  If you make more than you can use, you can freeze them.  I recommend using a vacuum seal if you have one.  Otherwise just squeeze as much air as you can out of a freezer bag and label it with the date they were frozen.

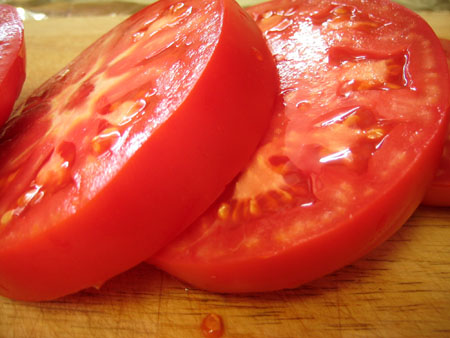
thick slices 2

Slice tomatoes thickly (between 3/8″ and 1/2″ thick). They are going to shrink quite a bit.  If you are going to roast romas, trim off the tough stem end and slice them in half length-wise.

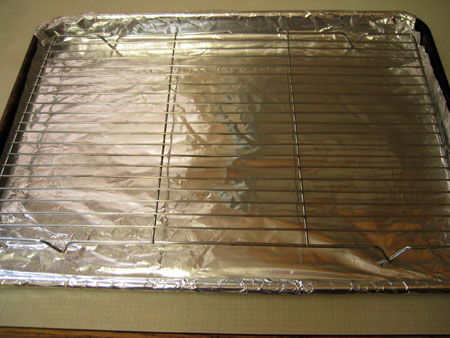
foiled pan with rack 2

Preheat the oven to 325 degrees. Line a baking sheet with aluminum foil to catch all the drippings. Then place a drying rack on top of it. This lets the oven air circulate around the tomatoes for better drying out. If you don’t have one, you can still make these, just put the tomatoes directly on the foil. They won’t dry out as well but you’ll still get the deepened flavor. A great alternative is to use paste tomatoes which don’t drip as much.

Lay the sliced tomatoes out on the rack closely together. (So you can fit as many as possible on one baking sheet). Incidentally, I always do two trays at a time. I do this because I can’t make small batches of things. I like to make as much as possible. Some people call this “greed”, but I prefer to call it SMART.

oiling toms 2

Brush all top sides of the tomatoes with either olive oil or other cooking oil. This will help develop a rich texture. Everything roasts better with oil.

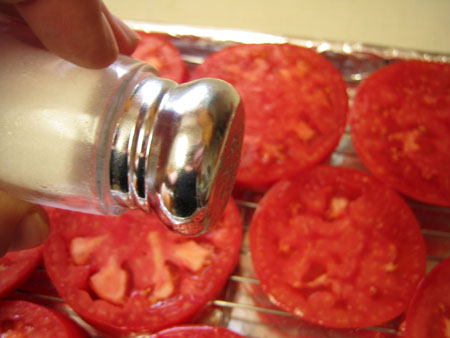
sugaring toms 2

Sprinkle with salt.

Then sprinkle with SUGAR. Lisa says this is VERY important. If you have used a slicing tomato then turn them all over and brush the backsides with oil and sprinkle with salt and sugar. You won’t have to do both sides if you use paste tomatoes.

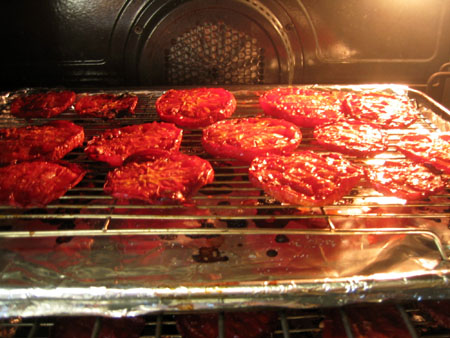
baking toms 2

Put them in the oven and cook for several hours. Yes, I know, it isn’t a quick recipe, but it is so easy I think you won’t mind the hours they tie up your oven racks. If you do two trays of them at once, I suggest switching the trays between the top and bottom rack every hour or so so that they all bake evenly.

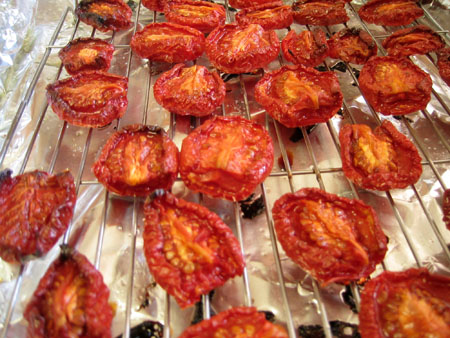
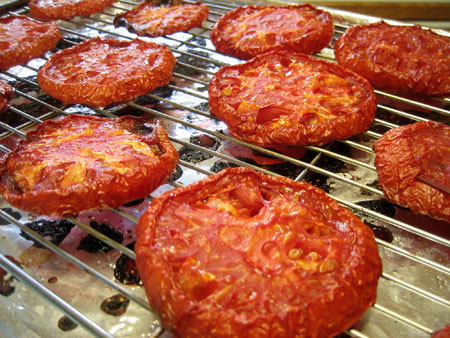
finished toms 2

They’re done when they are dried out a bit (but aren’t crisp), are half their original size, darkened in color, and smell richly of tomato. There’s no exact baking time.  It should take at least 3 hours.

So what do you do with these now?  You can put them on sandwiches with roasted eggplant, cheese, and pesto.  You can slice them up to add to pasta.  You can eat them just as they are.  You can use them to top pizzas with.  You can use them in a savory tart.  You can add them to soup.  You can use these in almost any recipe that calls for reconstituted sun dried tomatoes.

Read Full Post »

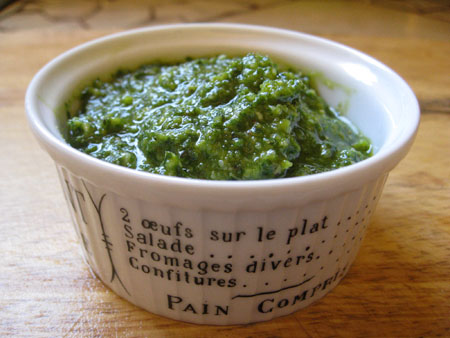
pesto 2

Mrs. C and Mrs. W’s Pesto

Ingredients:
2 cups tightly packed basil leaves
1/2 cup olive oil
1/2 cup Parmesan cheese
1/3 cup lightly roasted pine nuts
two or three garlic cloves
1.5 tsp salt*
1/2 tsp pepper

Method: Put all the dry ingredients in a food processor. Pour in the oil. Blend the heck out of it until it is precisely the texture you like your pesto to be.  You can also grind all the ingredients together in a mortar and pestle if you have a good one.  I don’t.

Recipe notes: Pesto freezes very well so if you have a ton of basil and can get your hands on all the other ingredients, I suggest you make as many batches as you can to enjoy during the cold months of winter when mired in root vegetables and dreaming of the taste of summer.  I recommend using a vacuum sealer if you have one for the best possible quality.

*Chelsea and I have a stylistic difference of opinion on the amount of salt necessary to make this pesto shine…I like one and a half teaspoons, she likes two. Basically, use as much as you think is best.

Read Full Post »

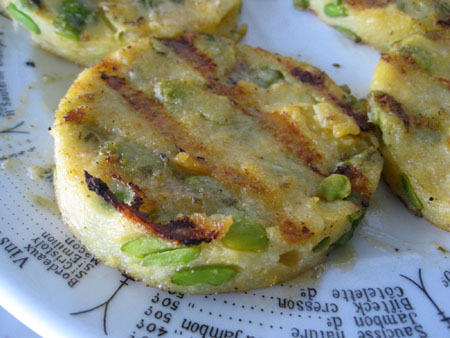
polenta with fava 2

Fresh fava beans come around only once a year for a very short period of time.   They are difficult to find in stores though they are becoming more readily available at farmer’s markets.  I usually grow my own because they are such an easy crop to grow and yield well even in less than ideal conditions.  They require some preparation for cooking, but are well worth the effort!  This is a recipe I make every single year when the fava beans come in.  I usually serve it with grilled onions, potatoes, and mushrooms, and a marinara sauce.  It makes a great early summer meal.

Ingredients:

1.5 cups polenta/corn meal (I generally use corn meal)

6 cups water

2 cups fresh shelled favas

4 Tbsp butter (optional)

2 cloves garlic (pressed)

1 teaspoon salt

many grinds fresh pepper

Method:

Bring the 6 cups of water to a roiling boil in a larg sauce pan.   Whisk the cornmeal into the water in a steady stream.  When it’s all whisked in and as smooth as you can get it, turn the burner down to low.  Put a lid on the pot, and let it cook until almost ready.  If you’re using a medium grind of polenta it could take 45 minutes to cook.  I use either a finely ground polenta or corn meal which is usually completely cooked in about ten or fifteen minutes.

Add the fava beans, butter, garlic, salt, and pepper to the pot and stir well.  Put the lid back on the pot and let cook for an additional five minutes.  Stir really well a couple of times before removing from the heat.

Pour the polenta onto a cookie sheet and spread it out with a spatula until it is evenly covering the whole cookie sheet.  Let it cool until it has stiffened.  This takes about a half an hour.  You can make this polenta a day in advance of using it if you like.  It will keep for several days in the fridge if properly covered.

Using a biscuit cutter (large size) cut the sheet of polenta into rounds.  You should get between 12 and 14 rounds.  Keep the trimmings to eat for lunch with marinara sauce or to fry up the next morning with eggs.

Coat each side of your rounds with a marinade or oil before grilling.

Recipe Notes: The butter in this recipe is optional.  You can either substitute it with olive oil or you can omit it all together.  I like adding it because it makes the polenta creamier and the butter compliments all the other flavors.  I have made it many times without and loved this recipe just as much.  You can add more salt if you like saltier food.  I tend to use less salt than many people.

Rosemary Marinade

Read Full Post »

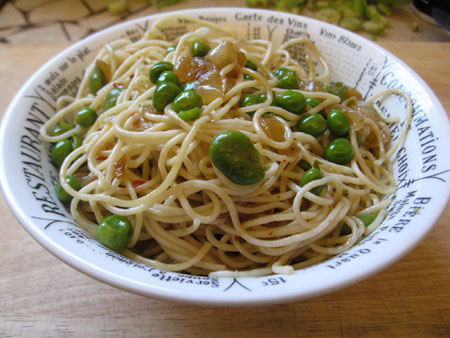
peas and favas 2

I look forward to eating this dish all year long.  The window of opportunity for it is very short, so you have to enjoy it while you can.

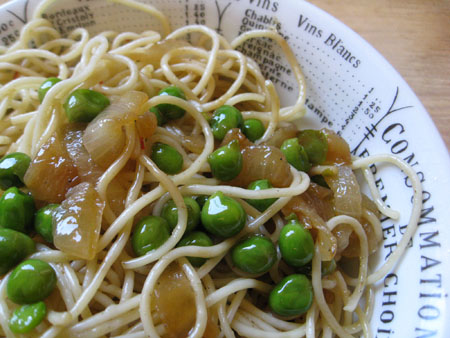
pasta peas 2

Ingredients:

Serves 4 generously or 6 moderately

2 large onions

2 cups fresh shelled peas and/or fava beans*

1/4 cup olive oil

8 ounces pasta (I love angel hair but I think any will do)

salt and pepper to taste

Method:

Slice the onions in thin rounds then into quarters.  Heat the olive oil in a large saute pan on med/hi heat, add the onions when the oil is hot.  To caramelize onions you want to stir them frequently and once they begin to clarify, turn the heat down to med.  The onions will be done when they are all caramel colored and soft.  Be careful not to burn them or they will taste bitter.   While your onions are cooking, boil water for pasta.

At the same time your pasta is cooking, add the peas and favas to the saute pan with the onions and cook for 3 to 5 minutes.  You don’t want to over cook the peas and beans.  Drain your pasta and add it to the saute pan with a small amount of the cooking water.  Add salt and pepper to taste (I use about a teaspoon of salt and about 10-15 grinds of fresh pepper, but I think most people would like this better with more salt).  Toss everything together really well.

Optional: add crushed red pepper and Parmesan cheese.

Recipe notes: this is such an easy dish to make and because there are few ingredients it allows the delicate flavor of the fresh shelled peas and the fava beans to shine.  I often like strong flavors such as garlic and herbs but this is an exception.  It only takes me about a half an hour to make.  Shelling the peas and beans takes time but you can do it while the onions are sauteing.

*If you are using fava beans be sure to remove the outer skin first by blanching and then dunking in ice water.

Read Full Post »

strawberry milkshake

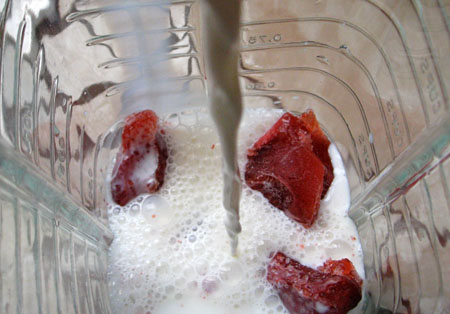
Pouring the milk into the blender.

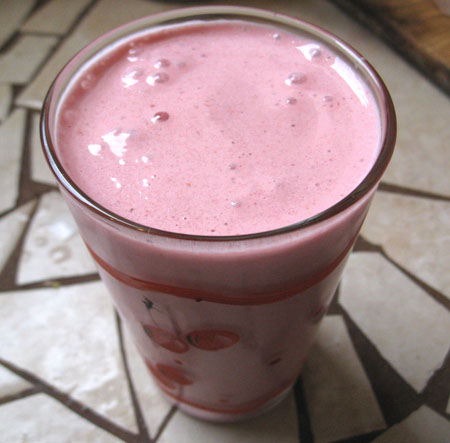
milkshake 2

This is a recipe that uses your frozen strawberries to make a milkshake that is low in sugar, high in flavor, and got my picky eater child to get some protein and fruit in his system.  It is simple, fast, and a great alternative to the more traditional shakes made with ice cream.

Ingredients:

8-10 frozen strawberries

1 cup milk (whole or low fat)

1.5 Tbsp sugar

Put everything in your blender and pulverize it until it is completely smooth.  How many strawberries you use depends on how large yours are and how thick you like your shakes.  Start with the proportions here but feel free to improvise until it suits your specific tastes.

This recipe makes 16 ounces of shake.  (One large one, or two medium ones).

Read Full Post »

Pico De Gallo2

En la Cocina with Casa de Lulu

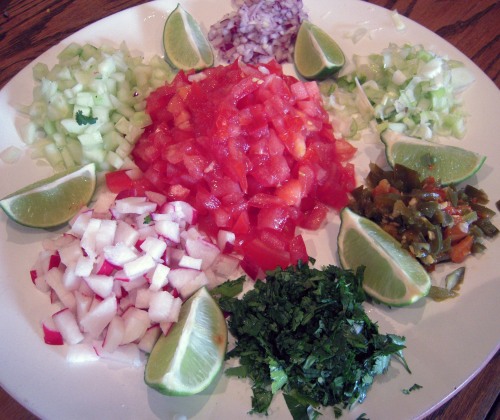
Here in the cocina, we are mixing up a batch of delicious Pico de Gallo today.  We are BIG fans of Mexican food and often prefer to make it rather than run down to the local taqueria.   Mexican food, especially in California, is fresh, delicious and actually very nutritious if you make your own.  We make tacos about  once a week with different fillings and always have fresh pico de gallo or salsa to top it off.  There seems to be some confusion about the difference between to the two, especially in the supermarket.  Salsa is actually sauce and the ingredients are cooked, (or rather roasted), for a smoky spicy flavor.  Pico de gallo is fresh, and can vary depending on the seasons and what you have on hand.

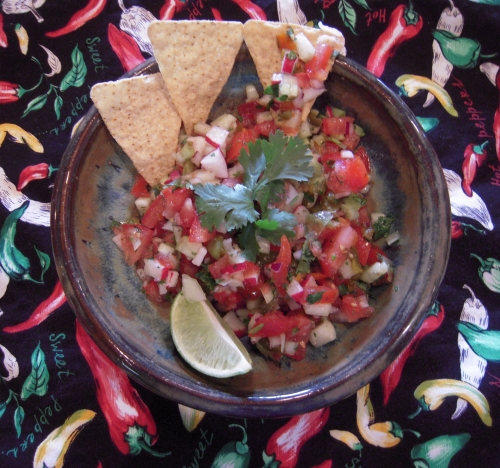
Pico De Gallo 1

So here’s a basic recipe that’s easy to make and delicious to eat.  All the ingredients can be found in any store- super simple.

For 3 generous cups of pico de gallo, you will need:

3 medium ripe tomatoes

2 tbsp minced red or white onion (not yellow!)

½ cup chopped cucumber

½ cup chopped radishes

2 tbsp of minced pickled (in the can) jalapeños

¼ cup minced scallions (optional)

¼ chopped cilantro

Juice of one lime

¼ tsp of granulated garlic powder*

1 tsp kosher salt**

Fresh ground pepper

Pico De Gallo 2

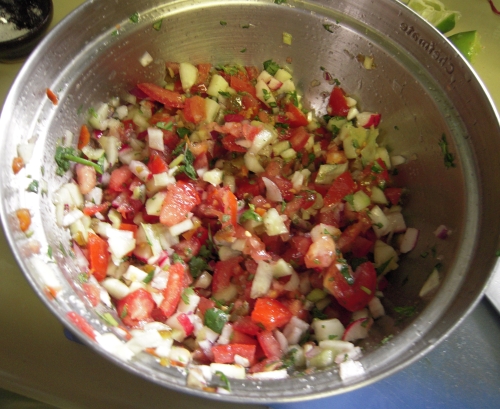
First, take the minced onion and let it soak in water for about 5 minutes- this greatly reduces its potency and allows the flavor to marry well with the other ingredients.  Place all ingredients in a bowl, then add juice and salt and pepper.  That’s it!  Es muy facil, no?

*Heads up all you Twilight fans- notice I add garlic powder not fresh garlic to this recipe.  This is up to you.  I find that fresh garlic is just too potent and overpowers the other flavors.  So if you want to hang out with that pretty boy vampire and knock down some margaritas, you’ll want to go easy on the garlic,  okay?

**Be careful about adding too much salt to this recipe- if you plan on eating this with chips, there’s already plenty of salt on them and you don’t want to sully the flavor too much.

Here’s some variations of the basic recipe that I’ve tried:

  • With beef tacos, I add oregano and lemon juice instead of lime
  • With lamb, I add fresh mint and orange juice
  • With fish, I add some mashed up avocados and chopped red cabbage

Read Full Post »

marinade 2
Ingredients:

1 cup olive oil
1/2 cup red wine vinegar
3 tbsp mustard (spicy brown or Dijon)
3 cloves peeled garlic, roughly chopped
3 – 4 sprigs fresh rosemary, chopped roughly
1 tsp salt
many grinds of fresh pepper

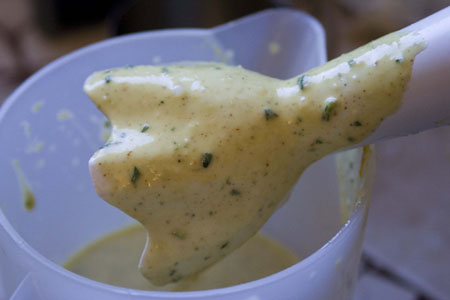
Put all of these ingredients in a deep bowl or measuring cup (large enough to use with an immersion blender*). Blend them until the marinade is thickened and all the rosemary is well chopped.

How to use this marinade: I brush it on everything I grill. It is my standby favorite. It is thick enough that it sticks to my vegetables and I love the rosemary and mustard combination. One of my very favorite ways to use it is to roast the following vegetables:

eggplant
mushrooms
onions
summer squash

Then chop all the roasted vegetables, combine with fettuccine pasta, and add some marinade to the pasta for sauce. Serve with Parmesan.

This would also be great on tofu.

Recipe Note:  I have never used a marinade on meat (because I have never been a meat eater) so I can’t say if the proportions of vinegar and salt are enough to partially cook meat before being grilled as marinades are often used for. I do know that this is a very flavorful way to dress anything you want to grill or broil. I don’t use it as a salad dressing because I don’t like rosemary for my salad as I think it’s too strong.

*If you don’t have an immersion blender, use a regular blender. Or a food processor. And then let me convince you that an immersion blender is so much better than a regular one.

Read Full Post »